Wednesday, March 7, 2018

Make a Catnip Mouse With Wool Weaving Scraps

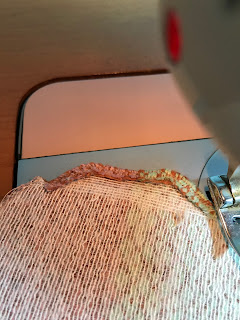
I made our cat Graycie a toy mouse several months ago with a scrap of wool fabric I had left over after making Teddy bears. She loves it and plays with it every day. She always seems to know exactly where it is, even when we can't seem to find it.


Here is the pattern and instructions, and below will be photos of the steps. Click on the words below for a PDF pattern to print.

Catnip Mouse Pattern

The pattern is traced on the interfacing and stitched around before cutting out.
Clips are made at B.
Press under 1/4" and stitch down between B1 and B2.
Mark stitch line
 Mark slit positions.
Cut slits 1/4" to 3/8" for ears.
Cut out ears from thin leather scrap.
Fold ear and insert in slit.
Fold fabric so raw slit edges are even.
Zigzag through the ear and the cut fabric edges to secure ear.
It should look like this on the right side.
Cut a 1" strip crosswise from an old t-shirt. About 8" is enough unless you are making more than one mouse.
Stretch the strip until it rolls into a narrow cord.
Stitch the tail at A. I didn't like the red with this mouse, so I found another color.
 Fold body in half and stitch to where seam starts to curve.
 Fold the body like this, keeping tail centered.
 Turn over and stitch on the previously marked line.
It should have a point with a bit of tail poking out.
Turned right side out, it should look like this.
Sew the remainder of the seam, backstitching at B. Keep the tail clear of the seam.
Poke the sewn rear triangle inside and use the tail to help pull the body right side out.
At this point, it looks like a fish with its mouth open.
 Stitch catnip bag. I used a piece of old sheet from my stash of rag rug strips.
 Stuff the empty bag inside the mouse body.
 Use a funnel in the mouth to add the catnip. Poke it in with the eraser end of a pencil.
When full, gather the end and stitch closed. trim the excess fabric from the bag.

Add a couple pieces of cellophane on both sides. I use cracker wrappers because they crackle. Cats like the crunchy sound.
Poke them in with a pencil.
Hand stitch closed with waxed thread, using a ladder stitch.
Done! Now to call my favorite kitty.

I'm not sure if the video will work. I hope so. Graycie liked it.

Tuesday, March 6, 2018

Leicester Dryad Countermarche Loom Repaired

A while ago, my friend Erin gave me her first loom when she decided to purchase a new one. Since she didn't have room for two, her Leicester Dryad countermarche loom moved to my studio.

My friend Marcia comes to my open studio every Tuesday, and I told her I would give her the loom if she wanted to help me get it working again. We spent last week working on putting Texsolv onto the loom, since I had stripped off all the cording.

Marcia purchased metal rod for the front and back aprons, so one of the first things we did was to replace the thin dowel in the apron hems.

We got all the Texsolv cording measured and installed. In order to get everything functioning and tied up correctly, we needed a warp on the loom. We made a quick one yard test warp. 

Countermarche and counterbalance looms need to be tied up from the top down after a warp is wound on the loom and threaded.

We tied a basic four shaft, six treadle tie-up and Marcia played around with the treadling. Her sample is quite colorful.
Our biggest job was ahead of us. There are two hinges on the loom. This one pictured is ok, but the one on the other side was not secure because a big chunk of the wood cracked at the screw holes and one of the screws was missing.

We had to unscrew the top three screws on both hinges so we could access the underside of the board to make the repairs.
The break goes through all three screw holes, with the piece completely broken off at the left hand hole.

We raided Bob's workshop for drill bits, wood glue, drywall screws and various other tools plus toothpicks from the kitchen.

This is the underside of the side board showing the broken piece. I pre-drilled three holes between the three hinge screw holes and countersunk the holes. The drywall screws worked well to draw the glued broken piece up tight.
Marcia finished attaching the piece.
As badly broken as it was, the repair looks pretty good.

We added toothpicks and glue, broken off in the screw holes, to give a better grip for the hinge screws. They went in without any problems.
Another problem we needed to take care of was to drill two more holes in the treadles. The tie-up cords were not able to connect directly under the lamms. They were pulling toward the front of the loom, making the shafts hit the beater and the lamms bump each other. I'm not sure why the loom was made that way, but the two additional holes made everything line up correctly.

We used pointed dowels through the correct holes in the Texsolv cord. One is visible under the treadle. We may need to do some slight adjustments once Marcia winds her next warp. We couldn't test our changes since we needed to remove the remainder of the warp to do the repairs.
The tie-up looks pretty good. This is taken from the side, showing the upper and lower lamms and the treadles.
This is the connecting point for the upper and lower lamms.
The last thing we fixed was the missing beater stop peg. Bob had some dowel the correct size in the workshop, so it was a quick fix, with Marcia doing a little sanding until it fit in the hole firmly.

All in all, I think we make a good team working on repairs.

Next week's project will be having Marcia wind a warp for her first handwoven dishtowels.