Friday, August 21, 2015

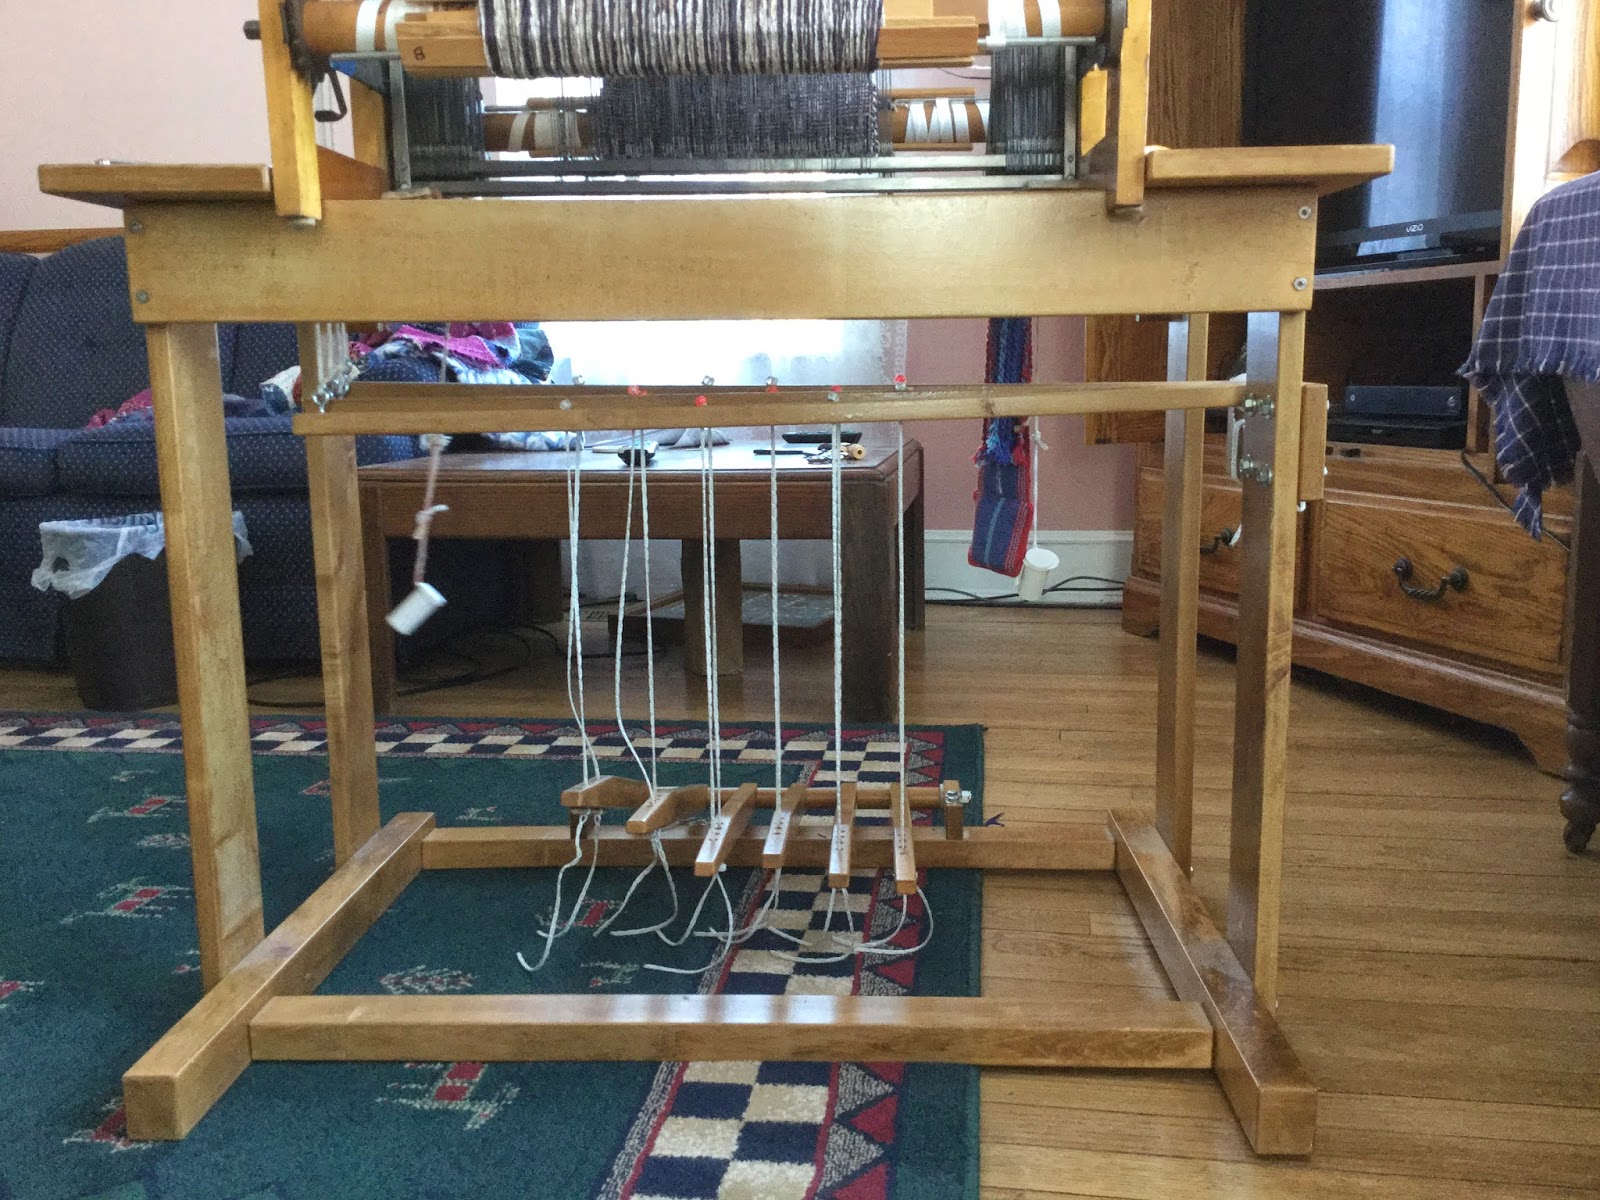
Folding, Unfolding and Adjustments to the Harrisville Designs 22" Loom

Due to frustrations others and I have had transporting this guild loom, I wrote up these instructions to try and prevent anyone else having the same problems.  Follow the instructions in the order given for ease of use.  The securing ties may seem like overkill, but they beat the alternative of trying to untangle all the cables and they will make the loom easier to use.

The loom in the photos is not mine.  It may have been modified and might not match other looms of its kind.
Tie shafts securely on all sides to keep them from swinging. (Use two ties per side.)
Unclamp the metal side braces attached to the back and fold the back beam forward.  Temporarily tie to the castle.  The brace will be fastened later.
Unclamp the front metal braces.
The metal braces rest on the screws in the bottom wooden side pieces.

In order to fold the loom, the treadles need to be released from under the cross brace board.  Push the breast beam forward slightly to tip the loom.
The treadles are now able to be raised.
Tie a couple cords around pairs of treadles near the hardware so there is something to lift them.
Unclip the treadles from the cords.
Place the front warp tie bar on top of the breast beam with slack in the tie-on ribbons.
Lift and tie the treadles to the breast beam over the tie bar so the treadles are standing upright.
Pull up on the breast beam to fold and fasten with the side bars and wing nuts. Keep the washers between the bar and wood to protect the finish. Tighten the wing nuts.
Success!  The loom is folded.


Unfolding the Loom

Starting with last instructions, reverse the process.  Make sure the rope is over each pulley wheel when attaching the treadle clips.  Also check the cables and pulley wheels at the top.

Adjusting the Shafts Before Weaving

With the loom unfolded, there may be a couple adjustments needed to get everything level and ready to weave.

Check the shafts to make sure they are level and all at the same height.  The distance from the top of the level shafts and the top of the loom should be 8 1/2".  If everything is level and at the correct height, the loom is ready for weaving.
If the shafts are not level, there are clamps on the cables on the right for making those adjustments. The clamps above the hooks on the shafts are not adjustable, so don't try to loosen them. The clamps on the loop ends of the cables on the right side are adjustable and are used to make the shafts level.

To level the shafts, first slide the clamps up on the cables.

Grasp both sides of the loop and pull one side up and one side down on the cable.  The right end of the shaft will raise or lower.  Adjust it until it is level.  Continue with the other three shafts.
Once the four shafts are level, slide the clamps down to the "s" hooks as tightly as possible to lock the adjustment in place.

One final adjustment may be necessary.  If the shafts are not all at the same height, the adjustment is made with the turnbuckles on the treadles.  It won't take many turns to change the height of each shaft.

Once the height is adjusted, it is time to weave.  Happy weaving!


Tuesday, May 12, 2015

Maple Syrup Time

5-17-2020 Note: this most likely was published in March 2015, not May. Snow and maple syruping are all done before May.
Today is a beautiful day to be outside!  With temperatures in the 40's, Bob and I decided we needed to get the sugar maple trees tapped today.  Our little bear Hamish, who always loves adventures, wanted to help.  I got out his wooden sled and he got to ride on it and take care of the pail of spiles.
Bob went to "the helpful place", our local Ace Hardware, and bought a new 7/16" bit for his drill.  The portable electric drill was much easier than the old brace and bit he used to use.  Hamish wanted to try everything, but Bob told him he wasn't strong enough to hold the drill or hammer.
Hamish was content to get spiles out of the pail and hold them while Bob drilled.  A pail lid made a pretty good seat.
"Thanks for the spile, Hamish."

"This is fun being inside the pail.  I hope Dad doesn't put the lid down though, while I am in here!"
"Sap tastes good!  Maybe not as good as honey, but my mom said it is much better after is is boiled and made into syrup.  I can't wait, but Dad said it will be a few days before we start to boil it.  We need a lot of pails full.  This was fun!"

A Rya Rug


I had a little bit of warp left after doing some rosepath rugs and decided to try a rug on page 50-51 of this rug book, which is a  favorite of mine. The rug is woven in plain weave, with spots of rya knots.

The rug will be for my granddaughter Hailee.  I'm sure she thought I forgot about her, but I didn't.  It is just that lately, I have more plans than energy.
The rya knots take small bits of yarn, 4" long.  Each knot is three strands.  I cut some thin cardboard 4" wide and about 6" - 7" long and folded them to 2" wide as cutting guides.  I wrapped the triple strands of yarn around the cardboard until I had enough for the knots in one row of the pattern and then cut them on the open side of the cardboard.
The rug has five spots across.  Each spot consists of five rows of knots, separated by a plain weave row. The first and last row of each spot has three knots and the middle three rows have five knots each.
I measured, cut and laid out the yarn for each row.
I marked the reed for the center of each spot. The first row takes the longest because I needed to find the center of each spot.  I started the spot in each row with the center knot.  It took me about 4 minutes to do the first row with fifteen knots.  The rest of the rows took about the same amount of time, even with ten more knots.


To tie a knot, place the three strands under the two warp threads on either side of the mark on the reed.
Wrap them around the two warp threads, making the cut ends even.
Separate the two warp threads and tuck the cut ends between them.
Pull on the tails and slide the knot down to the fell line.
It doesn't have to be real tight because the beater will push them tighter.
Continue adding rya knots on either side of the center one.
Remember to weave a row of rag weft between each row of knots and beat really hard.

When the spot is finished, weave enough rows of rag so the knot fringe doesn't overlap the next row of spots.

Notice the fell line isn't straight around the spot, but within a couple rows it straightens out.
The first row is complete and with a few more passes of the rag weft, it will be ready for the second row of spots. The fringe spreads out nicely even though all the knots are lying in one direction when woven in.

The rag weft is strips of ice dyed sheets, torn about 3/4" wide.  I am using two strips together.  One is pale green and the other is mottled blues, purples, and pinks. It gives a nice variegated look.


Saturday, February 28, 2015

Building a Stand With Treadles for my Leclerc Table Loom

Several years ago, my husband Bob and I designed a loom stand for my Leclerc Jano table loom.  I have had several people since then ask about making one.  We don't do that kind of work for others, but can give dimensions and show photos of how it should look when completed. I finally got around to doing all the measurements today.

This stand fits my 19 1/2" weaving width Jano loom (made before the Dorothys), and also fits my friend's Structo table loom.  With some careful measurements, it could be adapted to other looms with slightly different dimensions.

We used local hard maple from a local mill for the stand.

Although we looked at photos of other loom stands, this one was designed by Bob to my specifications. If anyone makes a stand from these measurements and writes about it, please give a link back to this post.  I am sure you will love your loom so much more with this stand.  It will turn a noisy loom into one that is much quieter.


Jano Stand right end
Upright end measurements:  3 ½” w, ¾” thick, 26 ½” T
Shelf measurement:  21” L, 6 ½” w, ¾” thick
End base measurement:  2” T, 1 5/8” w, 24 ½” L
Distance between uprights (inner distance):  8 ½ “
Distance from front of base to upright:  2 ¼”
Distance from back of base to upright:  6 ¾”


Jano Stand right shelf
Shelf measurement:  21” L, 6 ½” w, ¾” thick
Hole for treadle attachment cords:  1” from edge, 1” wide, 4” L, 6 ¾” from back, 10 ¼” from front


Jano Stand left end
Upright end measurements:  3 ½” w, ¾” thick, 26 ½” T
Shelf measurement:  21” L, 6 ½” w, ¾” thick
End base measurement:  2” T, 1 5/8” w, 24 ½” L
Distance between uprights (inner distance):  8 ½ “
Distance from front of base to upright:  2 ¼”
Distance from back of base to upright:  6 ¾”
Lamm pivot attachment measurement:  ¾” thick, 3 ½” w, 8 ¾” L
Distance from under shelf to top of Lamm pivot:  5 5/8”
Cut out on Pivot attachment: 3” x 1 ½”, starting 4 ¾” from the back
¼” pivot rod, cut long enough to stick out for removal if necessary.
5 nylon washers for spacers between lamms


Jano Stand
Lamm Pivot Point


Jano Stand back
Back floor brace:  1 ¼” tall, 2” w, 30” L
Back top brace:  ¾” thick, 3 ½” w, 34 5/8” L
Lamms (4): 5/8” w, ¾” T, 33” L
Screw eyes (4): 7/8” from the end
Treadle tie-up holes (6): spaced from the screw eye end, 9”, 11 ¼”, 13 5/8”, 15 ½”, 18”, 20 3/8”  (they will be approximately 2 ¼” apart)


Jano Stand front
Back floor brace:  1 ¼” tall, 2” w, 30” L
Back top brace:  ¾” thick, 3 ½” w, 34 5/8” L
Treadle attachment blocks (2): ¾” thick, 1 ½” w, 4 ½ L
Dowel treadle spacers: 1” dowel, 1 5/8” L
Treadles (6):  ¾” thick, 1 ¼” tall, 18” L.  They taper to ½” tall at the back, from the top edge 6 ¼” from the back.
Holes on the treadles (4): ¾” center to center, starting 13” from the front.


Treadle attachment on front floor brace (centered)


Treadles showing the taper.  
Texsolv cord, standard size
Connecting treadles to lamms (at least 12):  19” each
Connecting levers to eyelets on lamms (4):  28” each

Small “s” hooks (4) for attaching cords to levers.  To remove the loom from the stand, only the “s” hooks need to be disconnected. Loop them around the shelf and hook to the cords under the shelf.  The loom and the stand are easy to transport when disconnected.