Tuesday, April 23, 2013

Hamish Loves His New Clothes

I mentioned before that Bob's bear Hamish is named for one of the characters in the Braveheart movie.  I have had it in the back of my mind for a little while that he needed some clothes to go along with that character.

I wanted to go to Petoskey yesterday to visit my daughter Becky, and asked Bob if I could take Hamish along with me.  He said that was a good idea, since he was going to work and thought it would be good for Hamish to have an adventure.

Becky and I had talked about making the bear a kilt, so she got out her selection of plaid wools and Hamish picked out the pretty blue one.  He knew his daddy would like it because it was a color  he could see (Bob is color blind, but can see blue).

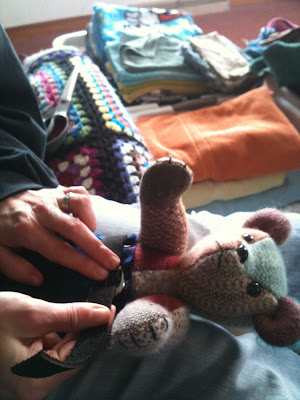
Hamish is sitting here while Becky is cutting the fabric after she took some measurements for his kilt.  She needed a long strip of fabric for pleating.
Hamish is "helping" her pin the pleats.  He learned about sharp pins the hard way!  Ouch!
The pleats were stitched down and then he tried on the kilt.  It looks just about right.  I took it to the ironing board to press the pleats, so it would look nice and swishy when he moves.  Guys and kilts are just about as bad as little girls with their twirly dresses.

While I was pressing, Becky got out her leather, punch, and buckles and created a belt.
She is making the final adjustment before trimming it to the right length.  Hamish is quite proud of his REAL leather belt and big buckle!
Well, isn't he a handsome lad?!
The over the shoulder cloth really adds to the outfit, and pressed pleats really are swishy!
Bob and Hamish both are quite happy with the outfit.  Happy birthday from Becky!
The Left-Over bears and all the other Griswold bears have been one of my favorite projects.

Stay tuned for the story of Gypsy Rose, which will be coming soon.


Monday, April 8, 2013

The Pink Pony and the Third Left-over Bear

While on vacation last week, Bob and I visited weaving friends, Lou and Betty, down in Arkansas.  Lou has several Newcomb looms, but doesn't use the flyshuttle mechanisms on them.  When I told him I bought a Weaver's Delight loom to restore but it didn't come with the tube stuffing machine (the pink pony), he offered the one he didn't use to me.  Thanks Lou!!

We went down to Arkansas on Bob's birthday, and while we were at Betty and Lou's house, I gave Bob his present.  I found out he never had a Teddy bear as a child, so I gave him my third left-over bear, T14.  Bob named him Hamish (pronounced Hay'-mish) after a character in the Braveheart movie.
We had a bit of fun with Hamish as we traveled home this past Saturday.  I taught him how to read a map so he could help his daddy with navigation.

We played our usual game of cows and horses, getting points for them on our side of the road, and extra points for white ones.  If we passed a cemetery on our side of the car, we lost our points.

Hamish kept telling me he wanted to ride the pony, and I thought he was talking about one of the ponies in our game.  Then it dawned on me that he overheard us talking about the pink pony, and that was what he meant!  When we stopped in Hannibal, Missouri for lunch, we got the pony out and let him ride.
Hannibal was kind of exciting for Hamish.  He threw his arms up in the air when he saw his first train!  "Here comes the train!  Here comes the train!  Yipee!!" he started to yell.  He was jumping around so much, Bob had to hold on to him for dear life, since that fence rail was right over a cliff!


The train was passing over the Mississippi River from Illinois and entered a tunnel through the hill.  Bob knows all the good train-watching spots and we were fortunate one came along before we got on the road again.

The rest of the trip was uneventful.  We did see the statue of Mark Twain and then a couple more trains in Indiana.  I suppose there will be more train-watching trips in Hamish's future.
Baby Teddy bears do get tired, especially when they try to stay awake for the whole trip.  Hamish was so afraid he was going to miss something!  He made up for it on Sunday we got home, spending most of the day sleeping. 

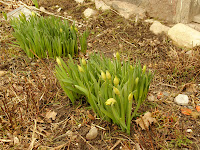
We are glad to be home, but not glad for the cold and snow.  It's melting quickly though, and spring is promising to be here soon.  Snowdrops are blooming and daffodils will be showing their sunny faces with a bit warmer weather.

Saturday, March 16, 2013

Mitering Corners on Handwoven Lace

A weaver recently asked me how I miter corners.  Photos are so much better than words, or really help the words, and anyone that has read my blog knows that is what I do best.  It is a long post, but here is the end result, all ready for tea.

When I first started to weave, I took a nine month long class called Weaver's Boot Camp.  This particular class assignment was to design a two-block lace pattern and weave 4 place-mats. Woven lace is a loom generated fabric that has holes in it. I chose Swedish Lace with lattice hem-stitching and made table napkins, instead of place-mats because my yarn was pretty fine. I have included my finishing technique for mitering corners with these step-by-step instructions and photos.  Feel free to borrow, but please include a link back to this post.  Thank you.

Wet finish the piece and steam press before starting so the weaving yarn is set.  Turn edge in 1/4" and press.
A chalk line is marked diagonally on the corner from hem crease line to crease line.  

If you are trying this without the hem-stitching, you will need to determine how deep your hem will be.  From the finished photo above, you can see that mine is a fairly deep hem, folding up to the first edge of the first hem-stitching row.  You may want to chalk mark that also.
Fold corner, hems and right sides together. Stitch on chalk line, from hem fold (not the edge) to diagonal fold. Use a fairly small stitch. Back stitch both ends.
Note that the stitching only goes to the hem fold, not the edge.  Trim the seam to 1/4". The hem is not turned down while trimming.

At this point, if your fabric ravels easily, you could carefully treat the cut edge with Dritz Fray Check.  It is a permanent treatment, and is a bit stiff, so make sure it doesn't  soak through to any area that will be on the outside.
Turn the pressed 1/4" edge hem on both sides.
Dampen corner and finger press diagonal seam open.  Raveling can be a problem, so use care.
Carefully turn the corner, gently working the point out with a blunt object.  I used a medium sized crochet hook.  
Fold hem and pin in place. Repeat for the other 3 corners.
Hand or machine stitch hem. I like to finish mine on the sewing machine. I set the zigzag so it will catch one thread of the hem...
and then one stitch into the hemstitching space.  Adjust the stitch length to try and avoid hitting the hem-stitching threads.  If your thread matches the fabric, you will be unable to tell that it is machine stitched unless you examine it very closely.

If you are doing mitered hems without the hemstitching, the machine stitching can be a straight stitch.
Done and ready for pressing!


Thursday, January 31, 2013

Productive Evening

After coming home from work today, I headed out to the studio and got quite a bit accomplished.  The rug I started on Fanny is now finished and ready for the next one.  And I cleaned up all my trimmed bits and pieces and fabric strips that were littering the floor.
I sat down in my rocker to give my back a rest and worked on a few draw-downs for my next rug on my Weaver's Delight.  I decided to try one of the other cam  set-ups, but wasn't sure which one I wanted to use, so I drew out the Kersey twill, the Birdseye and the Union weave structures.  With the stripes, I thought I would like the Kersey twill the best.

After settling that, I had a big chore to tackle.  While weaving my last rug on the WD, I had one cam that was hanging up and wouldn't rotate, so every fourth pick, I was having to poke at the cam to make it move.  I thought if I took the cams off and back on in a different order that it might help.  After putting on 8, 7, 9, and 10 and readjusting the key that holds them in place, I was still having the same problem.  Then I fiddled around with the cast iron part "A", scooting it a bit closer to "B".  I found a pretty loose bolt at the bottom of "B" and tightened that.  Hurrah!!  It finally worked as it should!

Once I knew that it was going to work correctly, I straightened out my warp threads and tied them back on the front rod.  I had a canister half full of heavy yarn that I used to spread the warp and get the temple adjusted.  The fly shuttle is working fine, so now it is all ready to go.  I just have to get some fabric strips cut.
This is a close-up of the Kersey twill weave structure.  The loom is threaded 1-2-3-4, with alternating navy and tan, and the rust threads are doubled to make them stand out a bit better.  They are threaded 12 ends per inch.  The color order reverses in each navy/tan stripe.

I may have to have a couple grandsons over soon to help me make a rug!

Monday, January 28, 2013

Autumn Leaves Towels Are Completed

Last October, I made a long warp for towels.  My inspiration was the beautiful fall colors on the trees in Michigan and was why I named the towels Autumn Leaves.  I was able to finish four of the towels before Christmas and they became Christmas gifts for my daughters.

I put the warp on my Leclerc Jano table loom, and after the first towel, I removed the two outermost stripes.  It was just too wide for the loom.  The next three towels wove a little better.

After cutting the first four towels off the loom, I retied the warp and started what I hoped would be five or six more towels.  As the warp decreased on the loom, it became easier to weave.  I cut a few more towels off and continued to weave the rest of the warp.  Each batch got easier.  I'm not sure if it was because of less warp on the loom, or I just got into a routine with the weaving.

I finished the last towels a few days ago.  The were wet finished, dried, pressed and hemmed, and then they were posed for a photo.  All of the towels were woven as checks with a single color except for the last one.  I had a little fun playing around with the block sizes, and I used all eight colors instead of just one.  I think I like that one the best!  It was a good way to empty all the bobbins of the yarn left on them.

Now, I am back out in the studio weaving a rug, and thinking about more rugs to follow.

I started with the intention of doing a rug with dark cloth strips in a twill pattern, but couldn't find the fabrics I wanted to use, so I went back to doubled threads in an almost tabby.  I am using up more polyester doubleknit strips I had sitting around in a box from an old braided rug attempt from many years ago.  Yea stash reduction!  This one is going quickly, but is not on my Weaver's Delight, so it is a little harder on my arms and shoulders.  I should have it done in a few days.

Hopefully, by the time this rug is complete, I will come up with fabrics to try my other design plan.  The way this is threaded, I can weave x's and diamonds, and they show up especially well in the white stripes.  I think it will make a distinctive rug.

Thursday, January 17, 2013

T12, the Leftover Bear

 While putting things away in my studio, I came across the left-over fabrics from last year's bears that I made.  A couple others in the family wanted one, so I got out the pattern pieces to see what I could come up with.  I actually got enough pieces drawn onto the fabric to make three more bears.

I decided not to push myself this year because of the arthritis in my hands, but was able to get one done for a Christmas gift. 

This is T12 with his joints installed and ready for stuffing. 

Fortunately, I had the parts sewn and the seams pressed when our power went out three days before Christmas.  The bear ended up being one of the projects I worked on for the three days without electricity.

He was stuffed and I got his arms and legs stitched closed, but by the time I got his head on, the sun was starting to fade.

 Once he got his mouth, he told me he wanted to be an artist.  He does look a bit artsy with the patchwork of many colors. 
Here he is by candlelight, holding his ears.  While counting up the fabrics for this patchwork bear, I realized that I didn't have all eleven of the other bears represented.  I switched out one of the sewn ears for the other two fabrics that I needed.

I had Bob hold a flashlight so I could sew that ear on the sewing machine by turning the handwheel.  It's a good thing it was just a small part, or my hand would have been super sore!

We were quite the pioneers.  I finished the stitching of his mouth, claws and ears by candlelight. He now represents all eleven of the other Griswold bears
Here he is at breakfast the next morning with ears attached.  We shared a bowl of Mama Bears Porridge.
Later in the day, I took him to Petoskey so he could meet some of the other Griswold bears.  Cheeka, Ben, Othar, and T12 had fun playing a video game.


T12 wanted to make a watercolor painting to take to his adopted dad, so Emily got out the supplies and helped him get started.  He decided to do a picture of Peter Rabbit.
Since Emily and T12 are both artists, they got along very well together.  They did a little experimenting, since neither of them had done watercolors before.
 While they were working, Becky (Emily's mom) made a beret for T12.  He certainly looks like an artist now!  The watercolor was finished and set aside to dry and the table cleared for a party.

Davey, Emily, and Bobby joined in along with Othar, Ben, and Cheeka.  Becky fed them homemade honey wheat bread with homemade butter, and of course there was lots of honey on the slices too.


After the party, T12 had to be packed so he could go to his new home in Spokane, Washington.

He had a long arduous journey that was very nerve wracking on my end, since FedEx decided not to track shipments that week.  He finally arrived by January 2nd, and was very happy to get unpacked!

His adopted dad Nick was very happy with him.  They are going to get along famously.  T12 has a new name, but it is quite similar to his old name.  Nick is calling him Tiz, because that is what the tag that came with him looked like. 

Tiz is looking forward to art lessons from Nick, who is an artist.  It will be fun to see what kind of art work they come up with.


Wednesday, January 9, 2013

Sett Solutions and Binding a Denim Rag Rug

After correcting the two threading errors on my second warp on the Weaver's Delight, I planned on weaving a denim rug next.

The loom was warped at 12 epi and set up to weave plain weave.  That was no problem at all with the rug at the left.  The fabric used for the weft was a polyester double-knit, so I didn't have any problems with the weft packing in tightly.

It took several attempts with the denim to get an acceptable rug.  Twelve ends per inch would not work with denim, or at least not with the plain weave I was attempting.  I had done a sample before on the tail end of a previous warp with strips cut 3/4" wide. It worked out great, so I wasn't anticipating problems. 

I could not get the denim to pack in tightly.  Then I remembered that my sample was set at 12 ends per inch, but it was a twill variation (Chicken Tracks), which essentially changes the ends per inch on each pick to six instead of twelve.  That allowed a nice tight weave.

Rather than re-thread, I changed the cams on the loom to the twill set-up.  It is just a simple 2-2 twill, and it made all the difference to how the denim packs down.  The 3/4" wide strips were just right.  An alternative could have been woven with plain weave with doubled ends set at six ends per inch.  I wouldn't attempt a rug with regular rug warp at only 6 epi.  It needs to be doubled to be strong enough for a sturdy rug.

Because I started over so many times before getting something that I liked, I neglected to start over again to give a proper header for a hem at the beginning.  To solve that problem, I looked in my Rag Rug Handbook for instructions for binding a rug.

I tied off my warp before removing it from the loom.  This photo is the start of the rug.  If I had been thinking ahead, I would have just glued the header and let it dry, thus avoiding the need for all the knots.  That is what I did at the end of the rug.

On the cutting table, I trimmed the warp close to the knots.

I used denim for the binding at both ends of the rug.  I wanted the binding to be about 1" wide when finished, so I cut two strips about 3 3/4" wide and a little longer than the width of the rug.
With the right side of the binding against the rug and even with the edge, I stitch through the two layers at the first denim pick.

This is not a project for an ordinary home sewing machine.  I am using my industrial upholstery machine.

Fold the hem ends as shown in the photo and stitch the ends even with the edge of the rug.
I didn't like how the hard warp knots felt under my feet, so I put some glue on the header, let it dry, and then cut through the knots to remove them. 
The hem ends were trimmed to reduce the bulk and then turned right side out.
The hem is turned up to the first line of stitching and then top-stitched.  I am sewing through four layers of denim on the main part of the binding plus the rug, and on the ends, eight layers of denim.

I don't think this would be my first choice for a hem, but I was glad I had the option.
I wish I had taken a better photo of the finished rug, but it's gone now, with no chance for a do-over. I gave it to our daughter Carolyn and her husband Eric for a Christmas gift.  The finished size is approximately 30" x 50".