Showing posts with label hemming. Show all posts

Friday, May 5, 2017

Taming Towel Hems

A few sewing techniques that aren't common knowledge can make a difference in how hems on towels turn out.  After taking so much time designing a beautiful towel, the goal is to have a hem that is equally attractive.

The techniques I use avoid some common complaints such as flared hems, rippling hems, and weft threads unraveling or poking out from the ends of the hems.

The first thing I do is serge apart my group of towels before wet finishing, leaving a thread tail of about 1 1/2" - 2" at each end. Serger chains tend to unravel, so an overhand knot on the chain somewhere will allow the chain to stay intact during wet finishing.  Many of the machine stitches on a sewing machine will work also if a serger isn't available, but the ends should be very secure so the weft doesn't unravel.

Wet finish using standard instructions for your yarn type. Dry and steam press.
 I turn the hem while doing my heavy steam pressing.  Don't let the hem area flare out.  The best time to control flaring is with pressing during wet finishing.  That is the press that will set the threads into memory.  If they are allowed to flare at this point, it is almost impossible to correct it later.

Pull the tail onto the first hem crease, pulling a tiny corner of the towel into the hem.
Fold up the next fold, enclosing the tail and corner. There shouldn't be anything sticking out. Pin if necessary to keep control. The top and bottom layer should be aligned.

Pick a thread color that is the least conspicuous when placed across the cloth and thread the sewing machine.
Starting at the top corner, one warp thread in from the hem edge, put the needle down through the layers and check the alignment again at the edge.

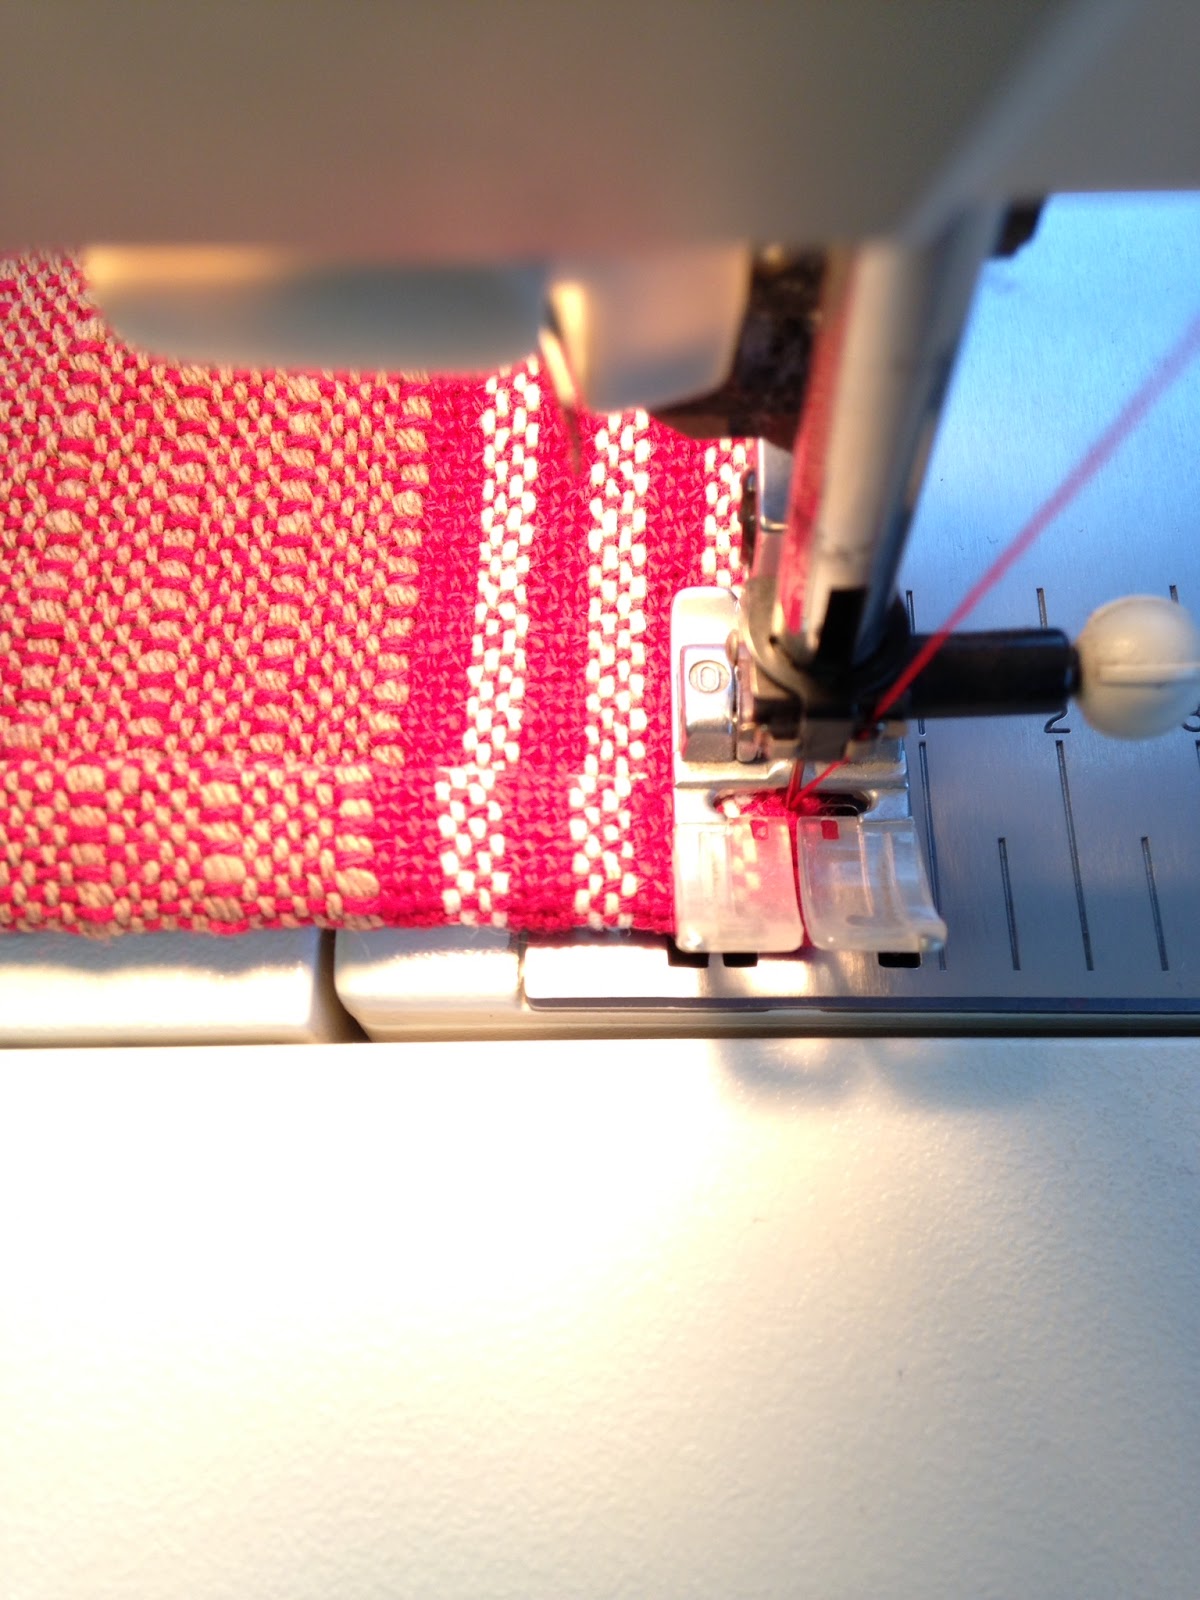
Do not sew over pins, unless you like to fix snagged warp or weft threads, purchase new needles or to pay for your machine to be timed again.


Stitch to the corner and reverse back to the start point, leaving the needle in the down position. Raise the foot and pivot to start sewing across the hem.
If you look carefully at the photo, you can see a little ripple of fabric in front of my finger. (Clicking on the photo should enlarge it.)  This is an easing technique used in the sewing industry. The little ripple is pushed toward the foot as the hem is sewn. It actually eases a tiny amount more fabric under the foot than the feed dogs are pulling and keeps the hem from flaring. Don't ever pull on the hem while sewing.

If you don't have a lot of control of your machine speed, you may want to use something other than your finger to do the pushing. Pierced fingertips will leave blood on your pretty towel!

Remove pins before you get to them, keeping stripes or pattern aligned until the other end of the hem is reached.

As you get close to the end, the beginning process will be repeated.  If you didn't turn in the other chain and tiny corner when turning up the hem, do so now.

When you reach the end, put the needle down one thread from the edge, pivot, align the edge and sew to the bottom corner, and reverse to the top of the hem.

Saturday, March 16, 2013

Mitering Corners on Handwoven Lace

A weaver recently asked me how I miter corners.  Photos are so much better than words, or really help the words, and anyone that has read my blog knows that is what I do best.  It is a long post, but here is the end result, all ready for tea.

When I first started to weave, I took a nine month long class called Weaver's Boot Camp.  This particular class assignment was to design a two-block lace pattern and weave 4 place-mats. Woven lace is a loom generated fabric that has holes in it. I chose Swedish Lace with lattice hem-stitching and made table napkins, instead of place-mats because my yarn was pretty fine. I have included my finishing technique for mitering corners with these step-by-step instructions and photos.  Feel free to borrow, but please include a link back to this post.  Thank you.

Wet finish the piece and steam press before starting so the weaving yarn is set.  Turn edge in 1/4" and press.
A chalk line is marked diagonally on the corner from hem crease line to crease line.  

If you are trying this without the hem-stitching, you will need to determine how deep your hem will be.  From the finished photo above, you can see that mine is a fairly deep hem, folding up to the first edge of the first hem-stitching row.  You may want to chalk mark that also.
Fold corner, hems and right sides together. Stitch on chalk line, from hem fold (not the edge) to diagonal fold. Use a fairly small stitch. Back stitch both ends.
Note that the stitching only goes to the hem fold, not the edge.  Trim the seam to 1/4". The hem is not turned down while trimming.

At this point, if your fabric ravels easily, you could carefully treat the cut edge with Dritz Fray Check.  It is a permanent treatment, and is a bit stiff, so make sure it doesn't  soak through to any area that will be on the outside.
Turn the pressed 1/4" edge hem on both sides.
Dampen corner and finger press diagonal seam open.  Raveling can be a problem, so use care.
Carefully turn the corner, gently working the point out with a blunt object.  I used a medium sized crochet hook.  
Fold hem and pin in place. Repeat for the other 3 corners.
Hand or machine stitch hem. I like to finish mine on the sewing machine. I set the zigzag so it will catch one thread of the hem...
and then one stitch into the hemstitching space.  Adjust the stitch length to try and avoid hitting the hem-stitching threads.  If your thread matches the fabric, you will be unable to tell that it is machine stitched unless you examine it very closely.

If you are doing mitered hems without the hemstitching, the machine stitching can be a straight stitch.
Done and ready for pressing!