Showing posts with label Julie. Show all posts

Wednesday, December 27, 2017

Tying a New Warp to an Old One, Lashing On, and Handling Pesky Color Changes


I recently finished three dish towels on Julie, my Swedish counterbalance loom. The design was a six shaft, combination of plain weave and 3/1 twill stripes.  I liked how they turned out, the weaving went quickly, and it was a single shuttle weave for the most part. I decided to wind another warp in different colors and rather than thread the six shafts all over again, to tie them to the old warp.

I wound each stripe of 30 or 40 threads separately, tying the cross on each bout, and placing a tight choke tie about 12" - 18" from the cross. I threaded them onto lease sticks at the front of the loom.
I left the previous towels on the loom and attached my tarp clamp temple to the edges to support them when I started to snip threads.  I clipped and tied one thread at a time and tied with an overhand knot.

I don't think I saved any time, but it was easier on my eyes, neck and shoulders than threading six shafts of texsolv heddles. Everything was right in front of me. The knots slipped through the reed and heddle eyes with only a little gentle coaxing.

These are the two towels after taking them off the loom and wet finishing them. I wove them each with a different color red.
I used the lashing on method after winding on my second warp.  I am becoming a fan of this method, which I learned from Milissa Ellison Dewey in one of her Facebook weaving group  posts. It is fast, easy, and gives a nice even tension to the warp. I wish I had a link to post here, but can't find anything.
Below the dark blue line is the finish of the first towel in these colors. It was woven in a light gray.

I like the look of cross stripes, but can add a fair amount of extra time to my weaving and usually requiring a second shuttle.

I am not a proponent of calling errors a "design element", but I did make an error that I decided I could incorporate into the design. I intended on using a double white line evenly spaced, but accidently did a triple line, so I changed my design to alternate two and three. It isn't an error any longer!

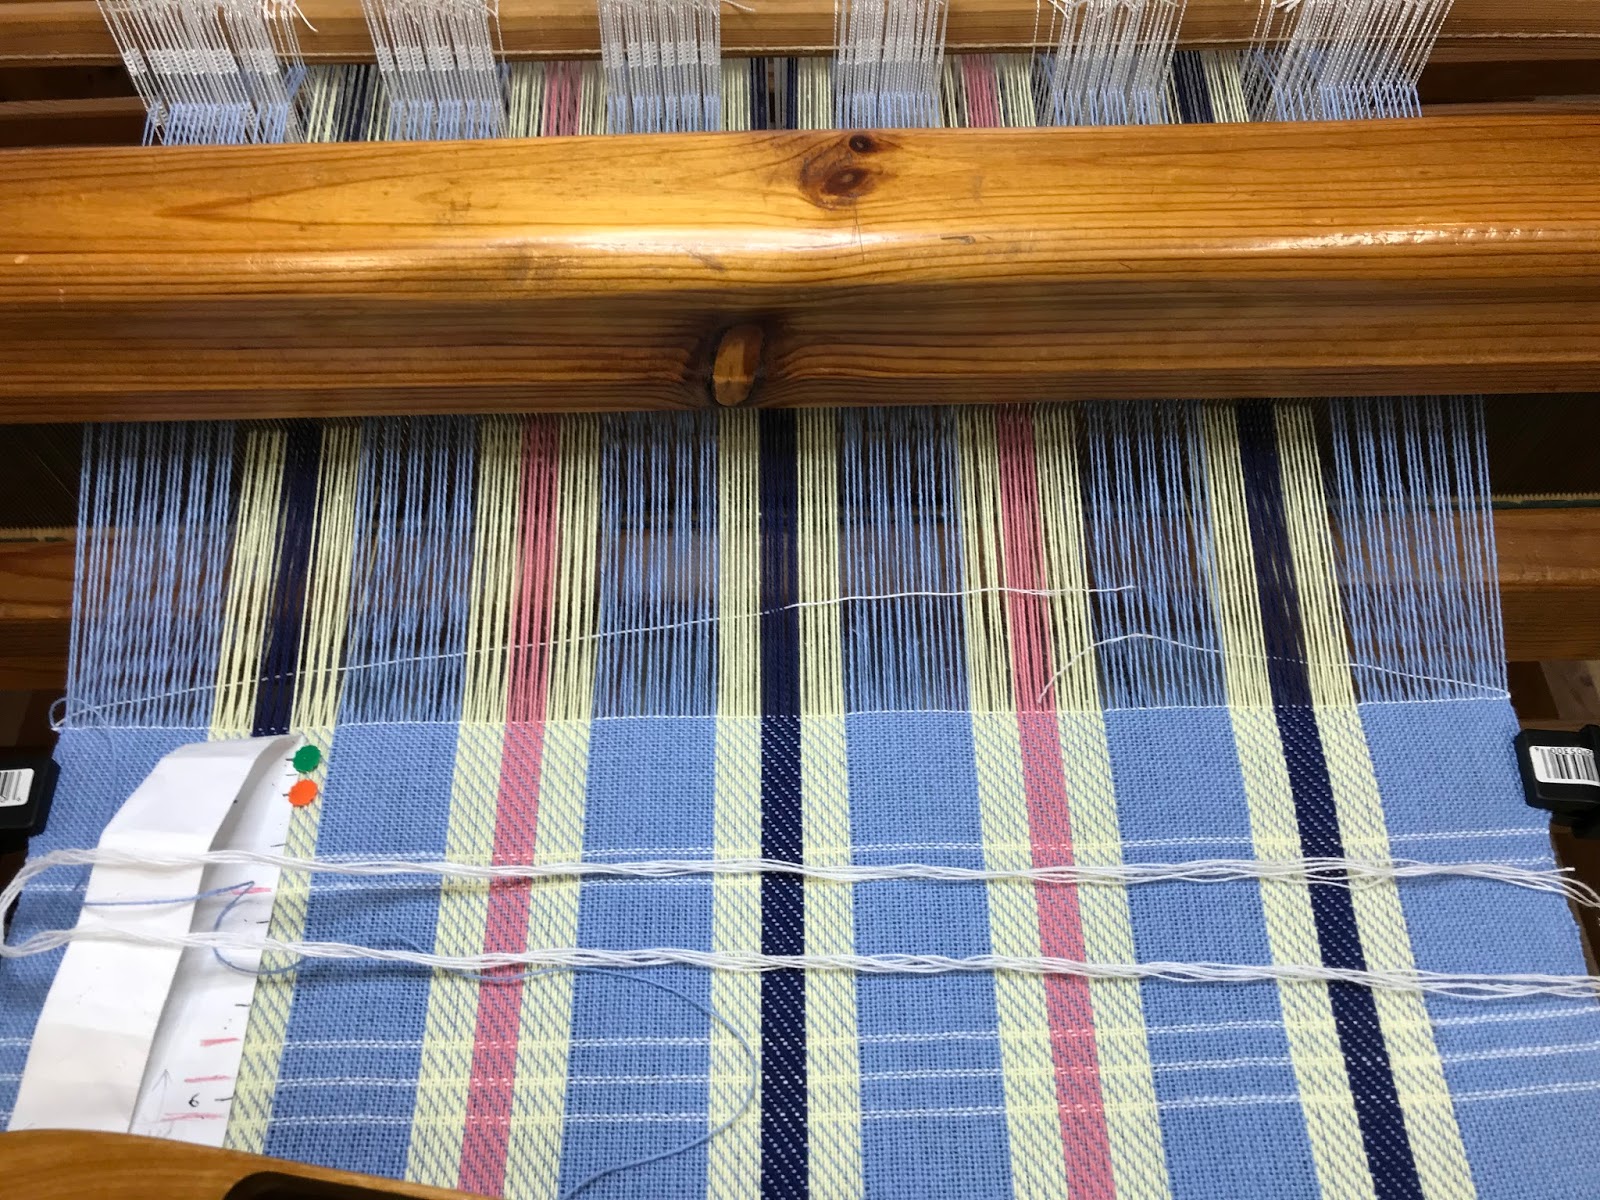
I decided on a two pick white stripe because it is easier to overlap the ends and creates no build-up on the edges.

I measured a few pieces a bit longer that twice the width and unplied one end on each of them. The bundle is lying across the towel.
I use a stick shuttle to push the weft piece through, so both ends hang out from the edges, and then beat.
Changing to the next shed, I push both ends in until they overlap. One end is already unplied. I check for a good overlap length, allowing for my angle, and trim to the correct length and then unply the other end and overlap in the shed and beat. Once I determine the proper length of the piece of weft, I cut the remainder of them and unply the ends ahead of time.
The overlap is hardly visible. (Click on the photo to make it bigger.)

This is a great technique for weaving rag rugs if the plan is for only two passes and it saves on trying to tuck the ends in at each edge.

I use the same method when doing a single pass of rag when doing rugs, but cut the strip half the thickness and a little more than twice the width of the rug. I wrap the rag around the outer selvedge threads and overlap in the same shed, somewhere away from the edges.
I'm really liking the look of this towel, and think my goof was a good one.

Saturday, August 26, 2017

Patience and Persistence Pay Off


For a little over a year, I have been working my way through this book with my 10-shaft Swedish counterbalance loom.
I started out with four shafts and a coarse yarn, making a table runner.

 Moving on, I skipped over trying a 5-shaft weave because it sounded a bit more complicated than I was ready to tackle. Six shafts was next on my list.


This was fun to search handweaving.net for a six shaft pattern. I chose #49712.
My friend Julie gave me the counterbalance loom I have been working on, since she had owned it for a long time and never used it.  I asked her what she wanted for it and she told me to weave her something. When I got to the time to try eight shafts, I decided to make her a Teddy bear.

It was back to choosing patterns again.  I wasn't going to weave for a single bear, so chose several patterns to pick from.
Jenny MacPokebeary joined Julie's family, and she loves the clothes and tartan Julie made for her.

I'm in the process of making other bears with the above fabrics.
I was finally ready to try five shafts, and that brings me to my frustration over the last few days. I chose a fairly simple pattern I found in a Handwoven magazine from Nov/Dec 2009.

My problem was with the tie-up of the counterbalance loom. Four shafts are pretty straightforward, but when more than four are used, some additional maneuvering around needs to be done.

 All the tie-ups start at the top when hooking up a counterbalance loom, with the pulleys, shaft levelers, the height of the shafts and beater, lamms, and last of all, the treadles. 

On page 218 of The Big Book of Weaving, the author gave instructions to hang five shafts with four horses and four pulleys. I think I tried it with various adjustments about three times, which meant getting under the loom and disconnecting all the treadles and lamms each time, leveling the shafts again, and doing all the tie-up again. Nothing was working well enough to get a good shed. 

In the book, under the first instructions, she mentioned switching to the eight-shaft pulleys if the first way didn't work.  I wish I had tried the second way first, because it worked!

Here is a side view of the shafts, horses and the two 8-shaft pulleys. Each pulley unit uses four horses. The first horse connects to shaft 1 & 2, the second to 2 &3, the third to 3 & 4, the fourth to 4 & 5.  The other pulley unit connects in a mirror image of the first one.

Right side horses connected to the shafts.

Left side horses. Note the mirror image to the right side.
A test gave me pretty good sheds so I wove a little scrap yarn.
I'm a happy weaver now!  This warp will become place mats or a runner.

Warp and weft is 8/2 cotton in black, navy, red and white.  It is sett two per dent in a 12 dent reed for 24 ends per inch (epi).

Thursday, November 17, 2016

Progress With the 10-Shaft Counterbalance Loom


I posted back in July about my latest loom restoration, and have been weaving on this old Swedish 10-shaft counterbalance loom.

Since I didn't know anything about a counterbalance loom with more than four shafts, I decided that was where I would start.

The only tie-up cords on the loom were the ropes on the front and back beams.  I had to make and figures out the rest.

I didn't have many spare string heddles, but found enough to make a test warp with about 170 ends.
Laila Lundell's book, The Big Book of Weaving, was very helpful with all the set-up.  I didn't have any Texsolv for the tie-ups, so I just used cording I purchased from the hardware store.  I figured it was cheaper if I made a mistake cutting lengths and could always be replaced once I had the loom working properly.

This shows the stage of leveling the shafts before tying up the lamms and treadles.
My first few inches of a four-shaft goose-eye pattern.  Everything seemed to be working properly.

This was my first experience using shaft levelers, the two notched bars hanging from one of the cross pieces.  I didn't have any, so Bob made me a couple sets, one for six shafts and one for ten.  The upper shafts fit into the notches and the whole set-up starts with them being hung from the beam above and leveled.

Notice the loom is still set-up in the garage.  I decided to wait to put Julie (named after her previous owner) in the studio until I finished the first warp, since there was more room to move around the loom.  It is hard enough at my age to crawl around under a loom, but even worse if it is in cramped quarters.
Success with four shafts!
I was able to get a long and a short table runner out of the sample warp.