Showing posts with label hems for rag rugs. Show all posts

Wednesday, September 3, 2014

A Question About My Rag Rug Techniques Post

Judy wrote to me with a question:

You said you thread your edges 4-4-3-3, but you weave raising 1&2 together and 3&4 together.  Doesn't that leave your edges without warp threads on the underside?

Judy Klineburger

Here is my answer, in case others had the same question.  Here is a close-up photo of what she is asking about.

Hi Judy,
Sorry it took me a while to be able to reply.  I had to go back onto the May 23, 2010 blog post, Rag rug weaving tips, to see what I said and then look at old photos to see if I had anything I could show to you.  I ended up taking a close-up photo of one of the rugs from that particular warp.  Using that technique, my hems are plain weave, 1-3 vs 2-4, which will have each thread separate except the last four edge threads, which will be doubled.  When I get to the body of the rug, I weave 1-2 vs 3-4.  You are right about the four edge threads all rising or sinking together, acting as one thick thread.  They will alternate with the next two warp threads.  Take a look at the attached photo.  I tried to separate the weft a little right above the red so you could see the four warp threads that the weft is wrapping around.  If you don't want to raise four threads together, you could change the last two threads to shaft one or two.  The best thing to do is just try it both ways and weave the one you like the best.  It is simple to untie the last bundle on each side and re-thread the last two warp threads.

Monday, February 21, 2011

Technique for Joining Rag Strips Worked Great

I just came in from finishing a rag rug.  I really liked the method for joining my strips.  I showed it in a previous post, as I decided to try it.  I did move the sewing over to my industrial Singer 111, because it sews faster.  If anyone tries this method, just make sure the fabric joins are staggered.  I overlap my joins about 1".  The join won't pull apart, because it has a solid strip backing it.  I was using a lot of doll clothes scraps, so some of the strips were short.  My strips varied anywhere from 6" to full fabric width.  To avoid stripes in the rug with the longer strips, just flip it over in the shed to have the reverse side show.  I used a neutral sewing thread down the center of the strips, wrong sides together, and the thread doesn't show in the rug.


Here is the hem end, with glue.  I will let it dry overnight and probably cut it off tomorrow and get it hemmed.  The colors in this photo don't show the green very well.  All the fabrics that I used had some green in the pattern.

These show the color a little better.

Sunday, November 28, 2010

More Stash Reduction

I know I am calling it stash reduction, but when I look at my stash after completing a project, it doesn't look like anything has changed!  I suppose others experience the same thing.  I can say though, that the recent projects did not involve buying anything new, and some of the materials were given to me.

The first project was a set of six placemats that I started a while ago.  I have a huge cone of fairly heavy cotton yarn that is dyed a varigated dark blue to white.  I have used it a lot, and the cone still looks big.  When our son Edwin told us he was getting married, I set to work finishing the placemats for Rebecca's bridal shower.  Her favorite color is blue, so it was perfect for her.


The weft yarn was from my vast stash of fairly heavy cotton yarn that was given to me a couple years ago. Both yarns used in this project have been used many times for teaching children to weave. It's a great weight for making a project weave quickly, and still end up with something that is usable.


My eight year old grandson, Davey, spent a few days with Grandma after Thanksgiving Day.  He had been doing some weaving on a rigid heddle loom, and was quite meticulous with his work, so I thought he was ready to move on to a four shaft loom. 
There was warp left over on the placemat loom, so we looked in the Davison book for a few choices for him.  Since it was already threaded 1-2-3-4, he decided on a 2-2 twill that reverses direction with color changes.  We decided that some white yarn and some different colors of green yarn that I had left over from another towel project would work well. 
 I only got videos of him working on the four shaft table loom, but I did get a couple pictures of his work.
His selvedges look great and he is being pretty consistant with his beat.  He was easily distracted though, so he only got a little bit done.  Guess Grandma will have to have him over again soon!


While Davey was weaving on his project, I finished up a rag throw rug made with wool fabric strips that a friend gave me.  It was a design as I go type rug, with the stripe width being determined by the amount of a particular fabric.  There were several different plaids and a few plain fabrics.  I decided to seperate the different plaids with plain strips.  To add a little interest to the plain fabric area, I twisted two colors together.  That was ok for a couple rows at a time, but I wouldn't want to do a whole rug like that because the twisting takes too long.
I am pretty happy with how it turned out.  After putting it down on the floor, I thought the colors would look nice in our bathroom, since the colors are similar to the colors on the "rustic" shower curtain.
 With the rug done, I got back to the linen warp and wove another towel.  This is still from pg 39 of Davison's book, weaving version II.  It is a single shuttle pattern, and goes very quickly.  Since I used a cotton varigated yarn with slubs, the pattern isn't real distinct.  It shows better on the closeup photo.  The yarn is varigated blue, turquoise, green, and lavender. 
Hopefully I have enough warp for at least one more towel.  I think I will do this version again with a solid color yarn.


All in all, I think I had a pretty productive last few days.

Monday, August 9, 2010

Tips For Rag Rug Hems

I was curious how my rugs turned out, so last night I cut them off the loom after using Kati Meek's method of securing the warp for the next rugs.

I showed the start of these quite a while ago.  The first one is a little nondescript unless you get up close.  Then it looks kind of interesting, because the fabric I used had quite a bit of color in it.  From a distance, though, it just looks boring tan.


This rug was woven with five fabrics, with strips approximately 13-14" long and 3" wide.  I seamed them together in a set order, although I think I reversed it a couple times.  My loom was warped at 12 epi, in a 12 dent reed.  That allows me to weave a hem on harnesses 1-3 vs 2-4.  I weave the rags with harnesses 1-2 vs 3-4, which gives me doubled warp at 6 epi.  I had a friend teach me this technique, and I think it makes a good sturdy rug, with hems that don't pull in too much. 
Oh, and another technique I use with the hems is to arch the weft, instead of just angling it.  I play around with the amount of arch until I get it where it isn't pulling in.  If I owned a temple, I probably wouldn't have to worry about it so much.  I made the mistake of weaving one hem on this rug the way like I wove the rags with the doubled warp.  The doubled warp hem pulled in a bit.

Sunday, May 23, 2010

Rag Rug Weaving Tips

I was reading a weaving friend's blog today, and she was having some trouble with weaving her rag rug.  I thought I could put a few tips on here, that I have learned from other weavers.

I just started weaving a rag rug yesterday, so I will use it as an example.

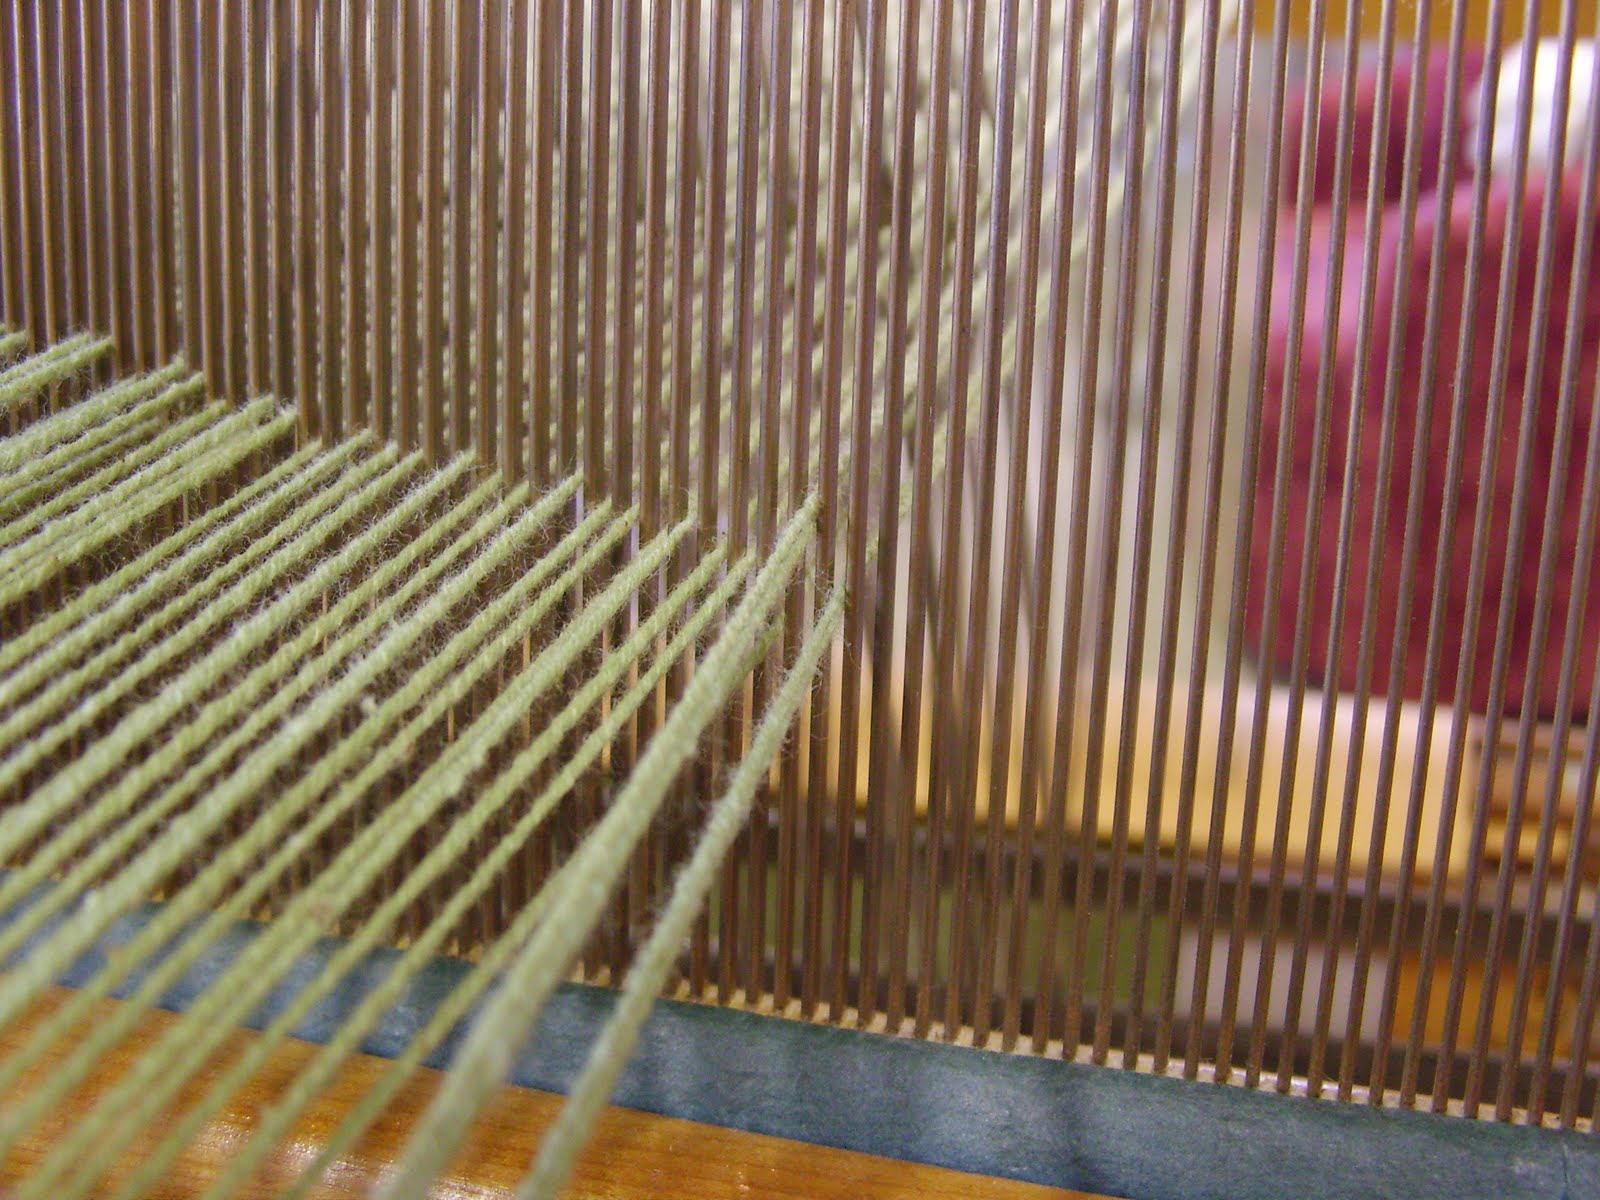
First of all, my usual rag rugs are warped with rug warp or a similar weight sturdy yarn.  They are spaced  12 epi in a 12 dent reed and threaded 1-2-3-4 or 4-3-2-1.  (click a photo to enlarge)

Each warp yarn gets its own heddle.  As you can see in the above photo, the warp is threaded 4-3-2-1 until the last 4 threads.  Instead of threading them 4-3-2-1, I thread them 4-4-3-3.  You will see why in a minute.
The last 4 warp threads are threaded 2 per dent through the last 2 dents in the reed for a sturdy selvedge.

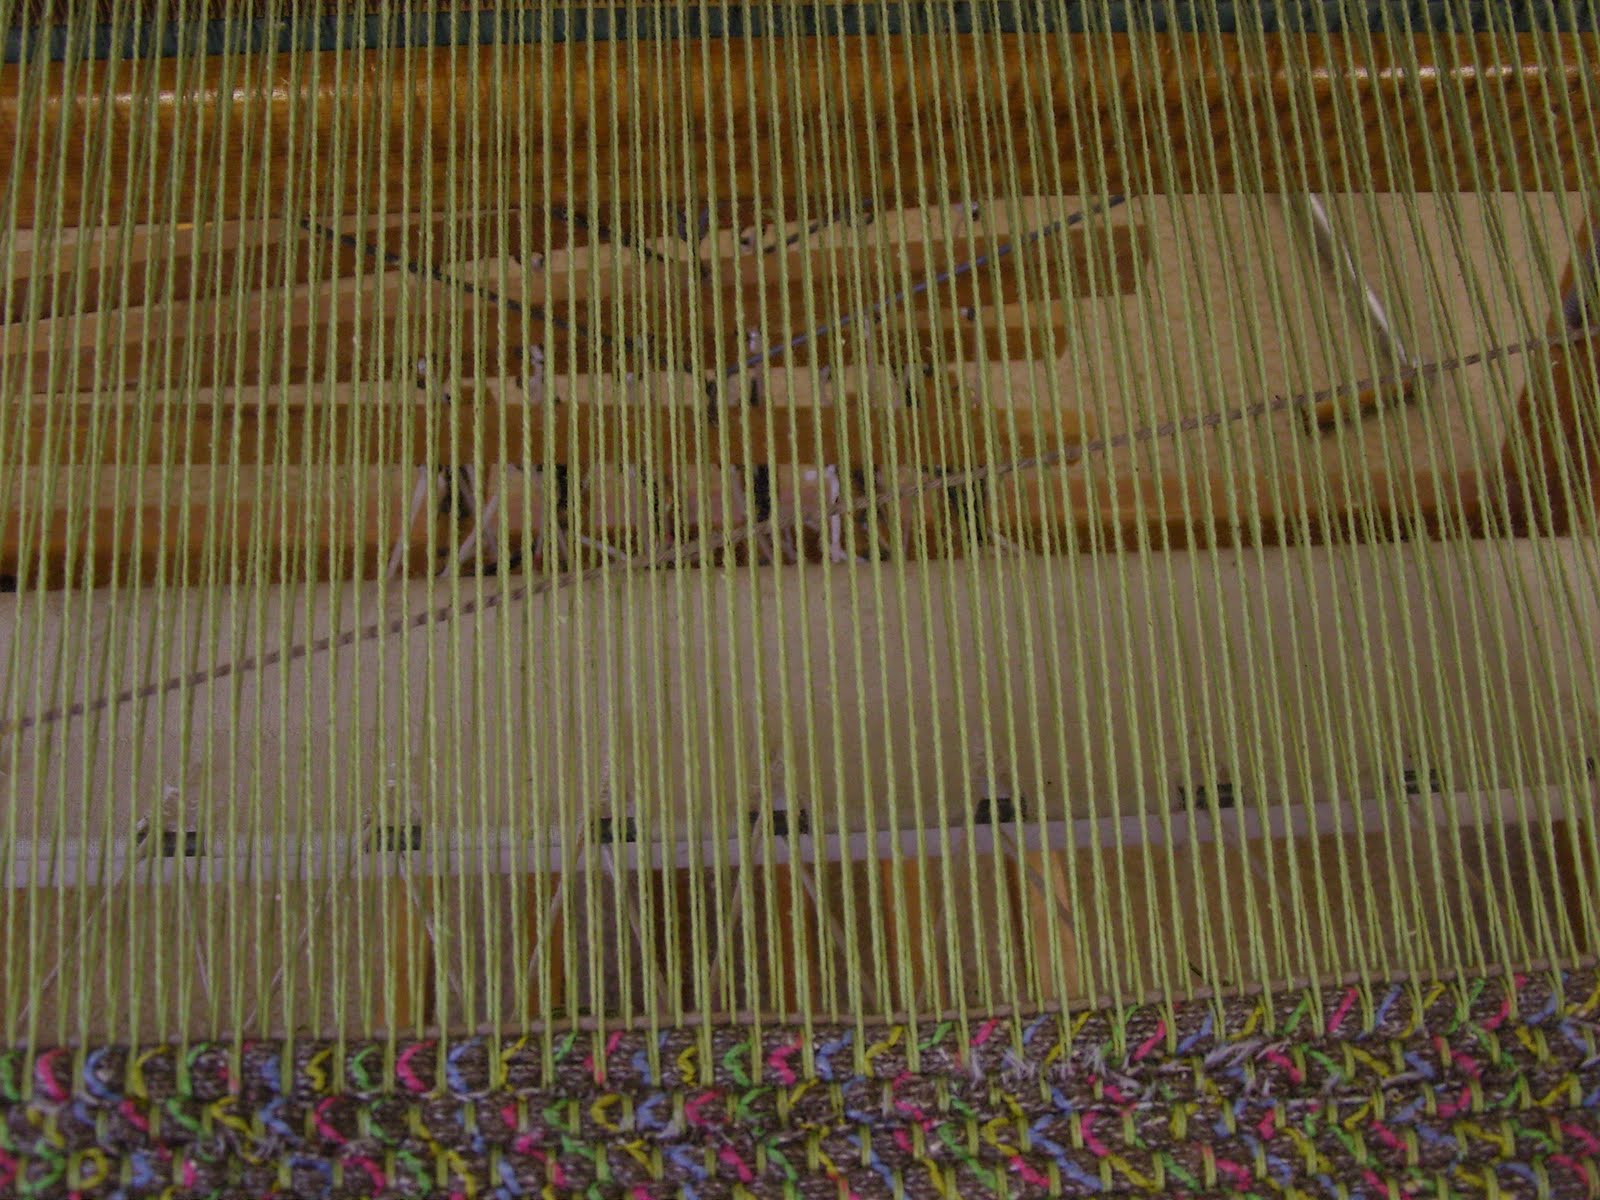
 Weaving for a hem can cause some problems, because the yarn used for the hem is so much thinner than the rags used for the body of the rug.  There are a couple things that can be done to minimize the draw-in that can happen.  If I'm using rug warp for my hem, I will double it.  I quite often use a thicker yarn, such as Sugar and Cream yarn used to knit dishrags, and I usually use a single strand of that size yarn.  I weave my hems with a standard tabby (harnesses 1 - 3 alternating with harnesses 2 - 4).

As shown in the above photo, I use my paperclip temple, which I have described in an earlier post.  Anchor the hem weft and angle in the shed.  Change sheds but don't beat yet.
(Sorry, this weft is angled in the other direction, but you get the idea)
With the shed changed, pull the weft into an arch, down to the opposite fell line and beat.  Do this for each pick of your hem.  It creates a bit of flex in the hem that doesn't happen with an angled weft.  A bit of practice will help you decide how big of an arch you need.

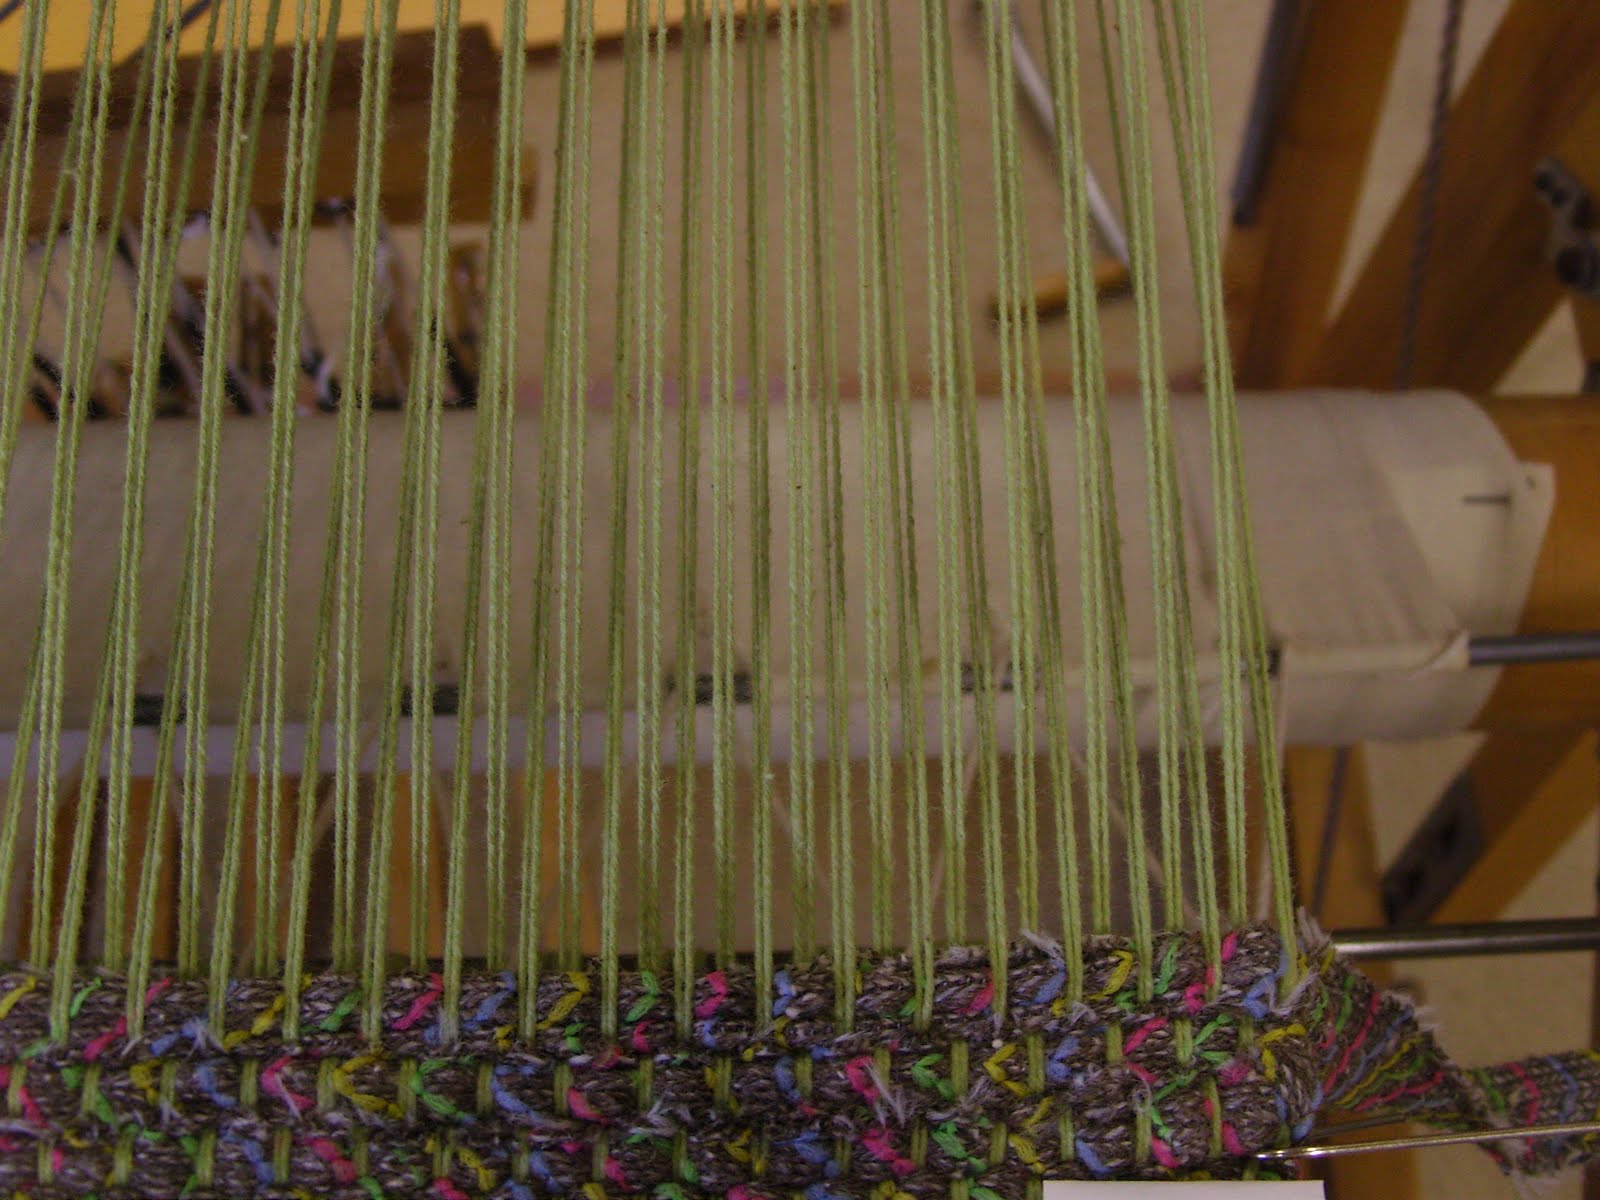
I use different treadles from the tabby hems to weave the rags.
I raise harness 1-2 together, and 3-4 together.  That gives me doubled warp threads sett at 6 epi.
I think it helps make a sturdier rug.

Here is the start of my latest rag rug that I'm weaving from a knit I found in my stash.  I showed the fabric in my previous post.  This fabric is the thickness of that icky old polyester double knit everyone sewed with years and years ago.  I cut the strips 1 1/4" wide and it was just right.

I sew my strips together with the following method:
Place two strips at right angles, right sides together.  For illustration purposes, I have marked my stitching line.  I don't really mark my strips.  That's what eyeballing is for!
Stitch from the top corner to the corner of the underneath strip.  I like to backstitch a couple stitches at each end of the seam, but a small stitch length without the backstitch would also work.  Add another strip to the end of the second strip and continue sewing ends together without cutting the threads.  To avoid tangling your strips, wait to cut the threads until you are ready to wind them on your shuttle.  When winding onto the shuttle, trim the seam allowance to 1/4", removing a small triangle. If I am folding my strips so only one side shows, I finger press the seam open to reduce bulk in one spot.  If I'm not folding my strips, I don't do anything to the seam except trim it to 1/4".

Thick hems can be hard on sewing machines if proper technique isn't used.  I will show my method of sewing hems on a home sewing machine in a future post, so stay tuned!