This is half of the heddles, with one bunch strung together with garbage bag ties to keep them in order. I oiled the ends of each bunch, to help them slide on the bars easily, and to protect them from developing rust.
The heddle bars were sanded with 150 & 100 grit sandpaper, followed by black sandpaper, used wet. It did a good job as long as I kept hosing the rust off. They were oiled to keep rust from forming, and to help the heddles slide smoothly.
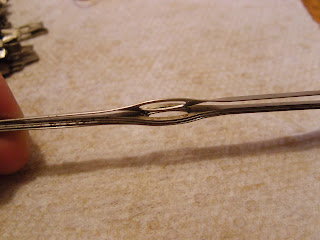
When lining up loose heddles, it is important to have the eyes all aiming in the same direction. Each side of the eye is curved slightly in opposite directions. Three in this photo and nested together nicely, and the fourth one is the wrong way. I just laid them on the table, and threaded them on the garbage bag ties as I sorted them.
When I had a group ready, I slid the heddle bars through the end holes before removing the garbage bag ties.
I couldn't find three of the screws for the harness brackets, so I used some that I brought home from work. They were removed from someone in surgery, and sterilized, but the patient didn't want them. They were a perfect fit, and they won't rust!
While attaching the iron hardware to the bottom of the shafts, a couple of the screw holes were too large. The remedy I use is to get some glue on a toothpick, poke it in the hole, and break it off.
Let the glue dry a bit before inserting the screw. One or two pieces of toothpick are usually enough to make a smaller hole.
Shafts 1-4 are completed and ready to install. I'm setting them aside, and moving on.
The next project is to clean the rest of the rusty nuts and bolts that my wonderful husband Bob helped remove tonight. I will clean, paint, and oil them, and sand and varnish the remaining wood parts, while everything is apart.
There are lots of parts soaking in vinegar, ready for cleaning in the morning. I'll be smelling like a pickle tomorrow!


Another wonderfully informative post! The shaft wood has a nice warm patina....
ReplyDelete